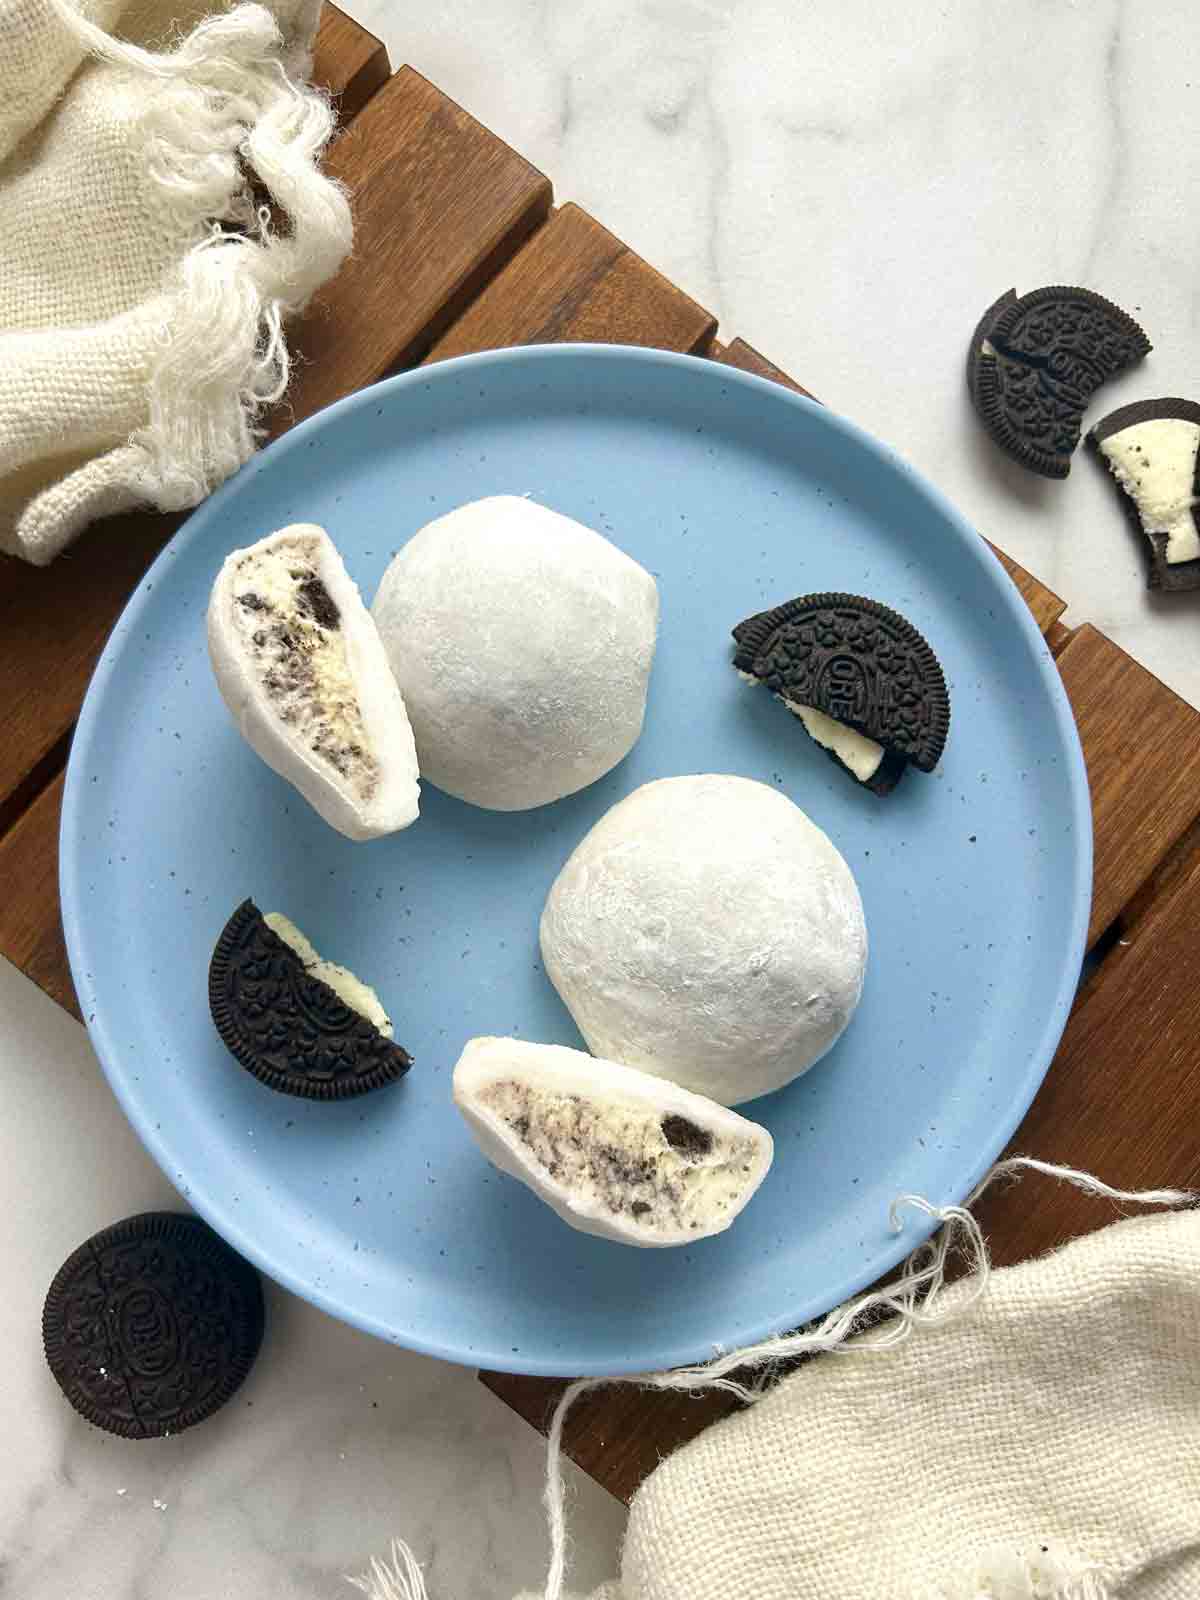
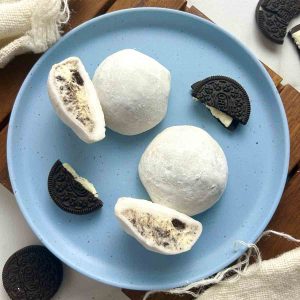
Today, I'm combining Oreo ice cream with one of my favorite desserts: mochi! It's surprisingly easy to make, and the combination of textures is to die for. I made my own Oreo ice cream by crushing Oreo cookies and mixing it with vanilla ice cream.
Key Ingredients
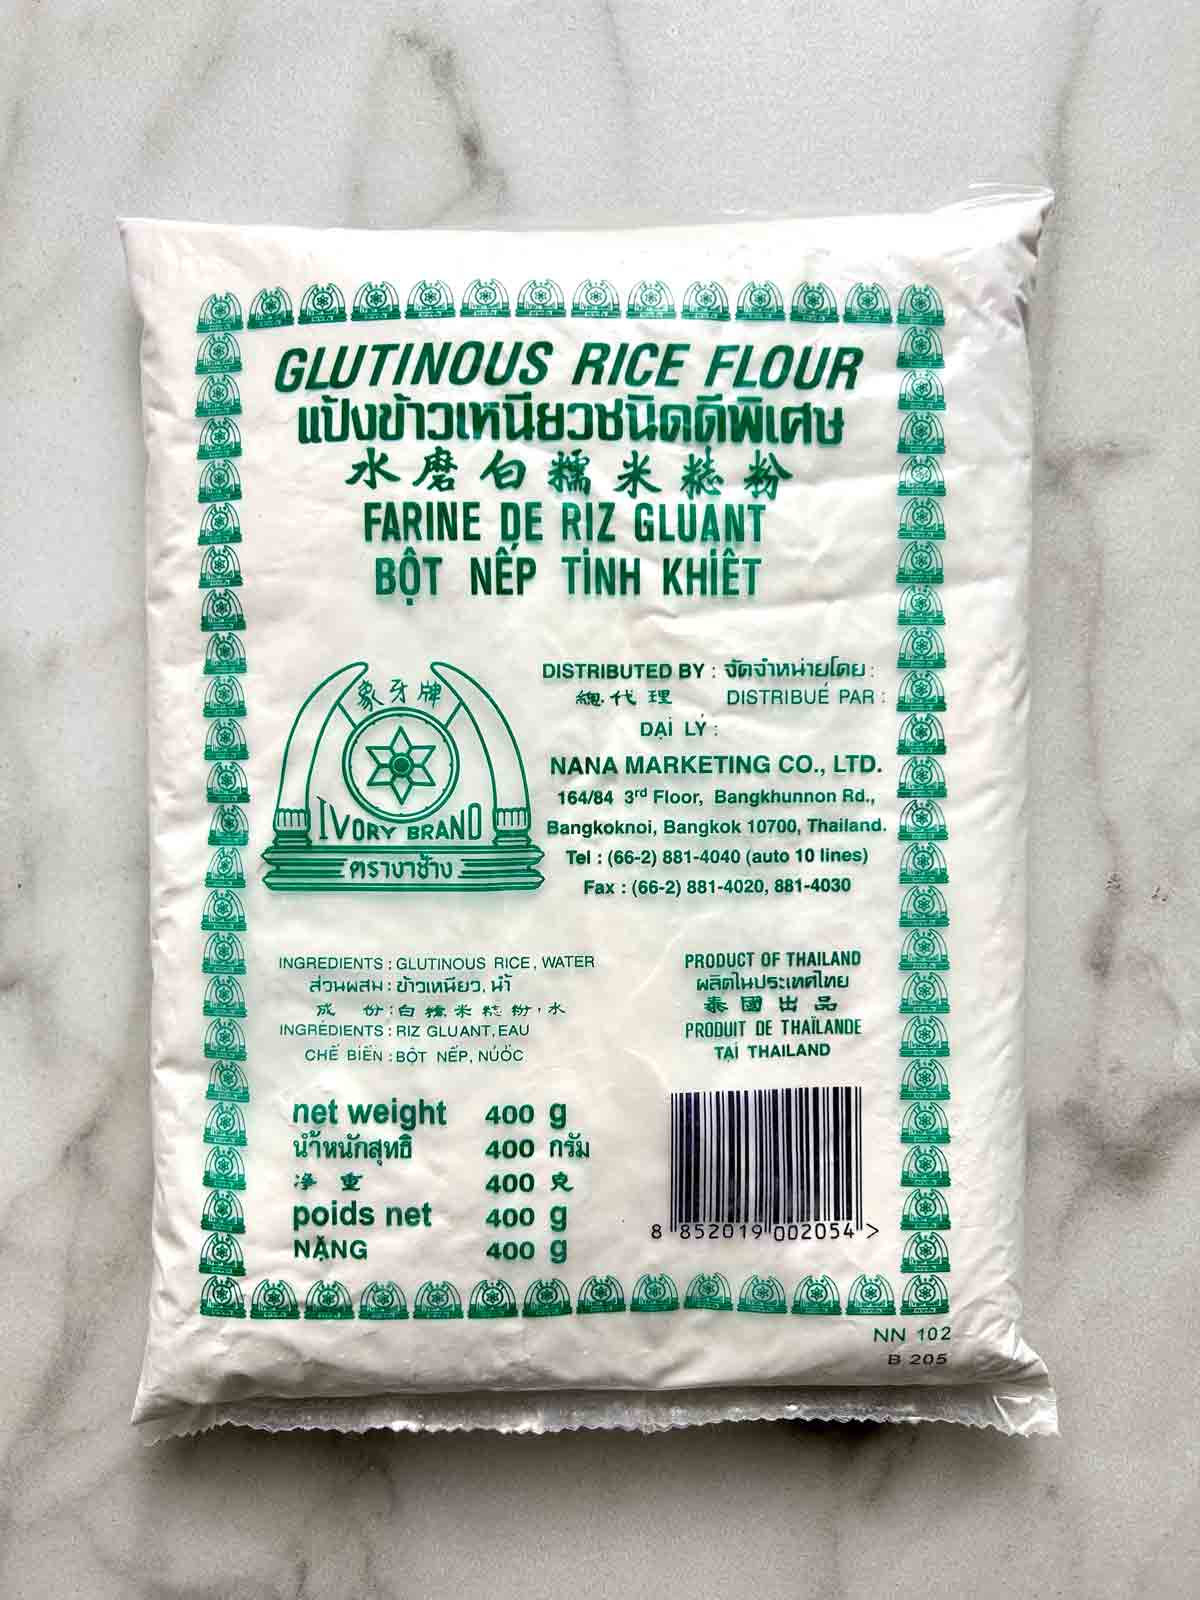
Glutinous rice flour
This is a type of flour made from sticky rice. It's called "glutinous" rice flour but it's actually 100% gluten-free. When it's cooked, it has a very chewy texture. You can find this at most Asian markets in a clear plastic bag with green lettering.
Cornstarch
Mochi dough tends to be very sticky so we need cornstarch to prevent it from sticking to everything. You want to thoroughly dust the dough and your work surfaces with it. Avoid using regular flour. I tried it before but it added a "floury" taste to the mochi that I didn't like. Cornstarch is much less noticeable in the final product.
Oreo cookies
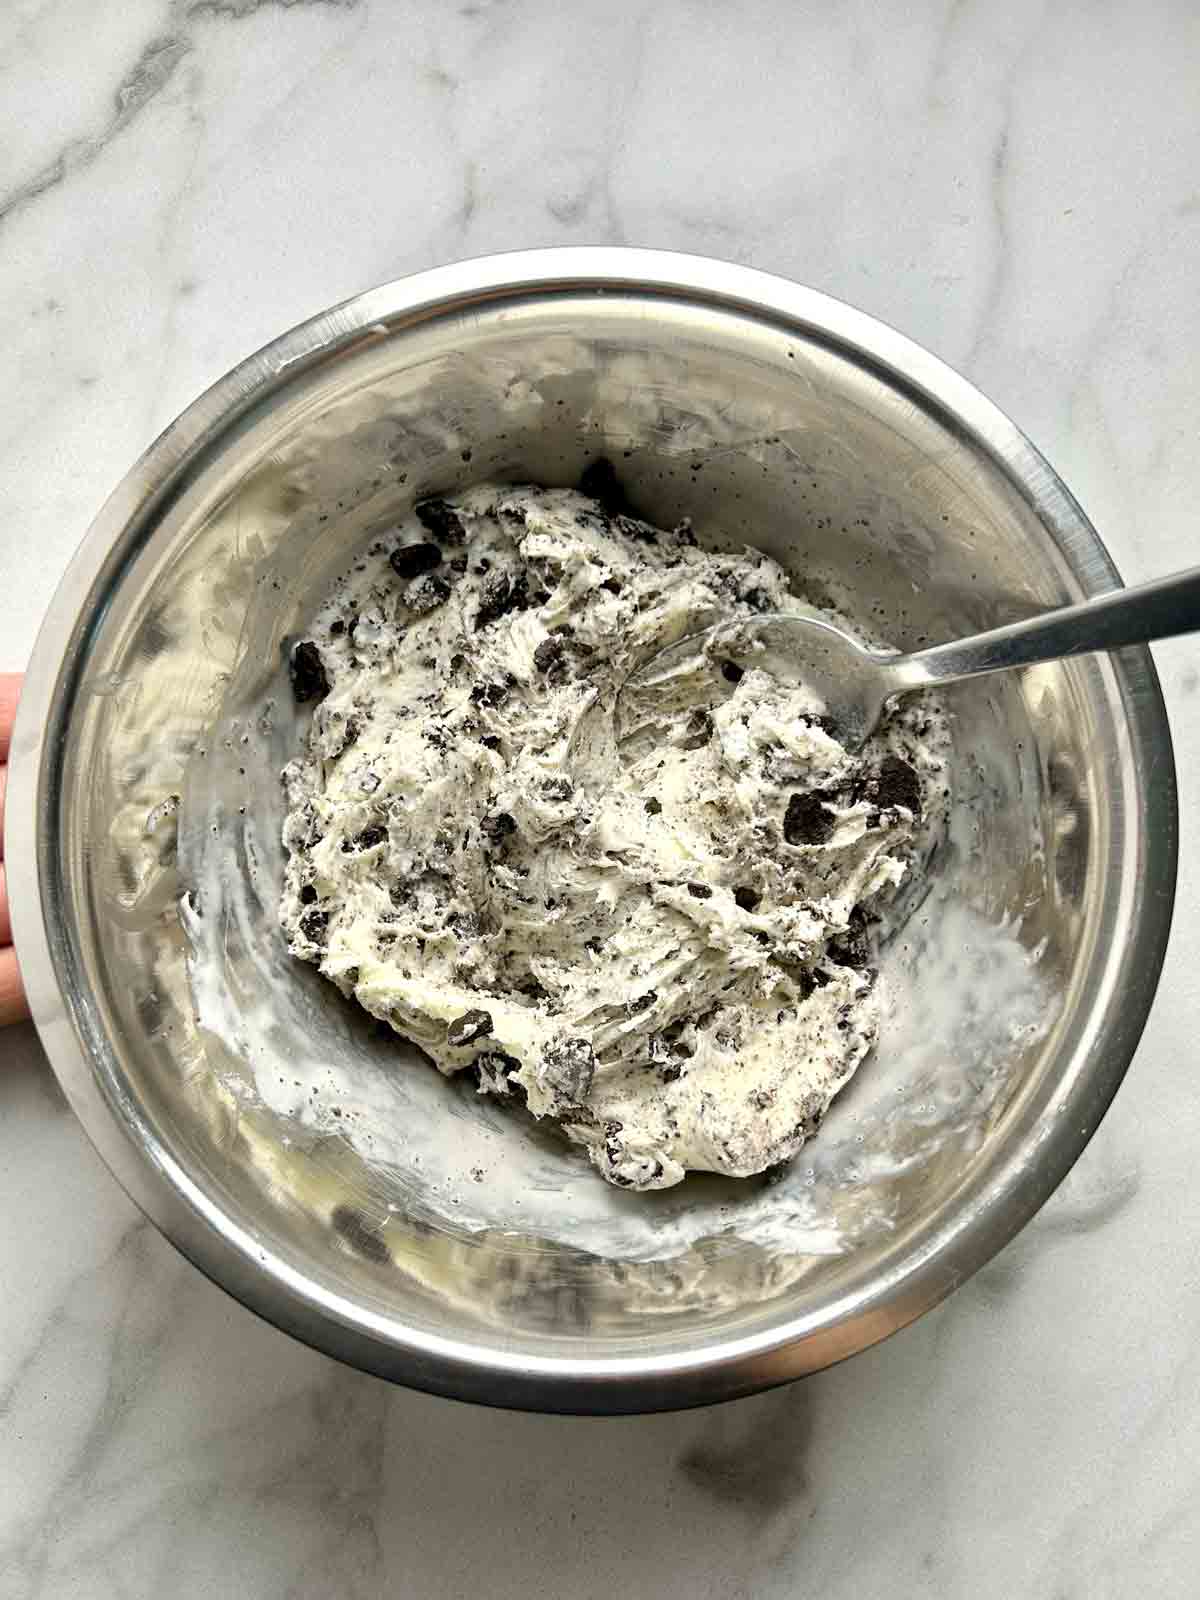
For the filling, I crushed my own Oreo cookies and mixed them with vanilla ice cream. You can also use store-bought Oreo ice cream, but personally, I think homemade tastes much better. I like to leave some bigger Oreo chunks so you get surprise cookie chunks in some bites.
Freeze your baking sheet
This will prevent your ice cream from melting as quickly. I like to put a piece of parchment paper on top and pop it in the freezer for 10 minutes. You can also freeze your mixing bowl and spoons if you're really keen.
How to make the filling
Crush the Oreos with a food processor, then mix it with the vanilla ice cream in a small bowl. If you don't have a food processor, you can also use a Ziplock bag and rolling pin.
Then, use an ice cream scoop to portion the ice cream onto the cold baking sheet. Try to shape the ice cream so that it is flat on the bottom. After shaping the ice cream, it needs to be frozen for at least another hour to firm up.

How to make the mochi dough
This is a method I learned a long time ago on TikTok. Just combine all the ingredients and microwave in one-minute intervals until they form a sticky dough. Make sure to give the dough a good mix between each interval. It took me 3 intervals to get the dough right. The dough should look like this:
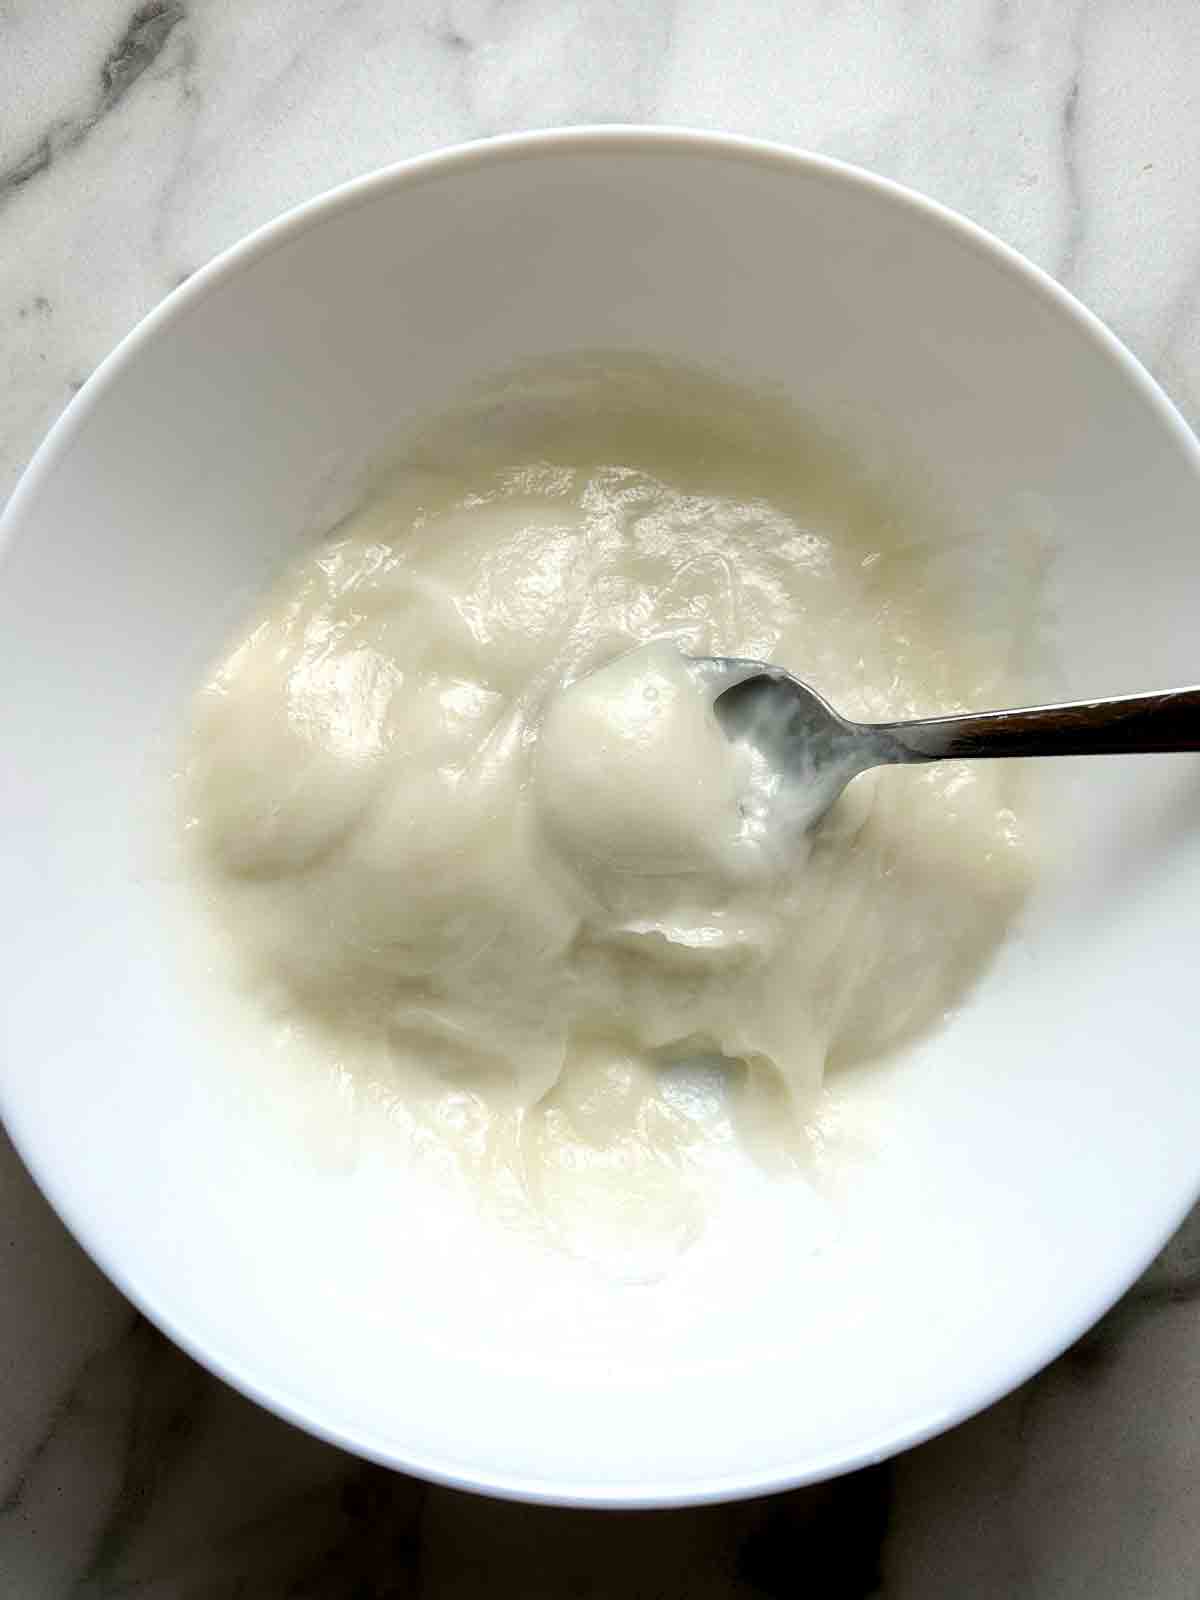
The dough doesn't really overcook, so feel free to do more than 3 intervals if it still looks uncooked. Let the dough cool for about 15 minutes (it will make it much easier to work with).
How to wrap the mochi
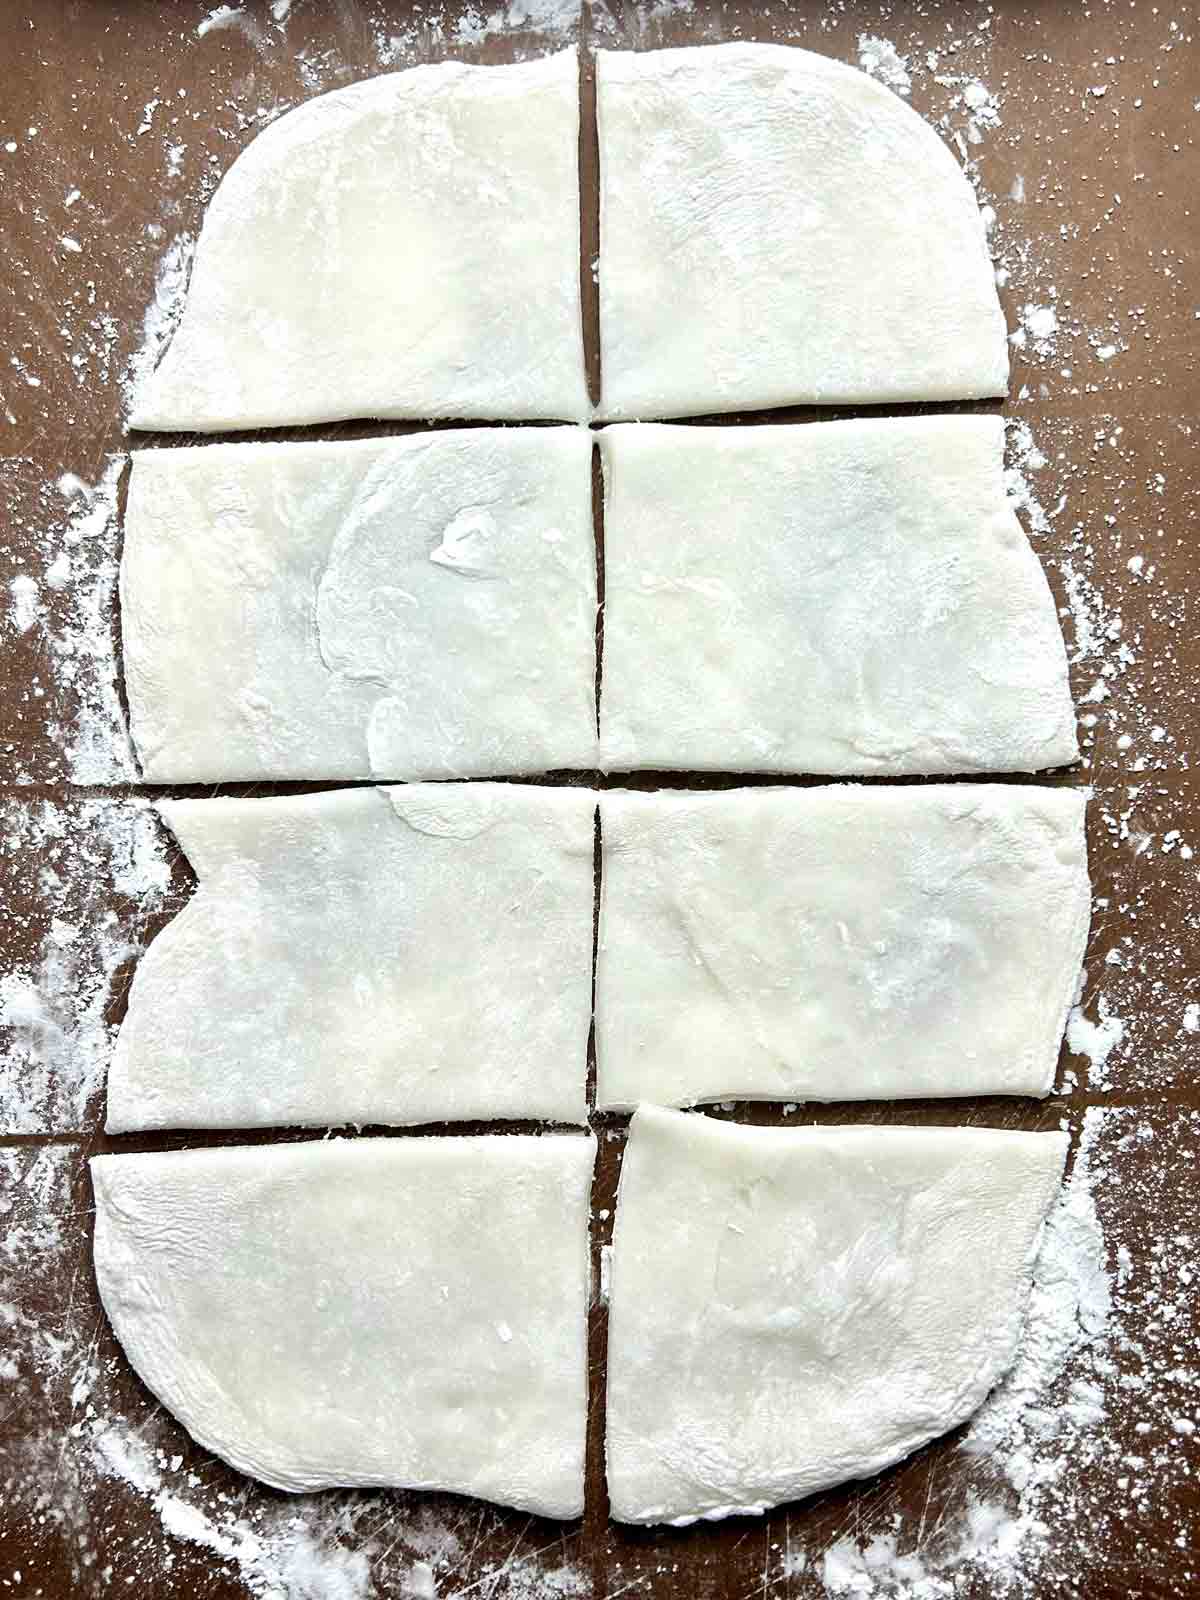
Roll the dough into a ¼-thick rectangle and cut it into 8 portions.
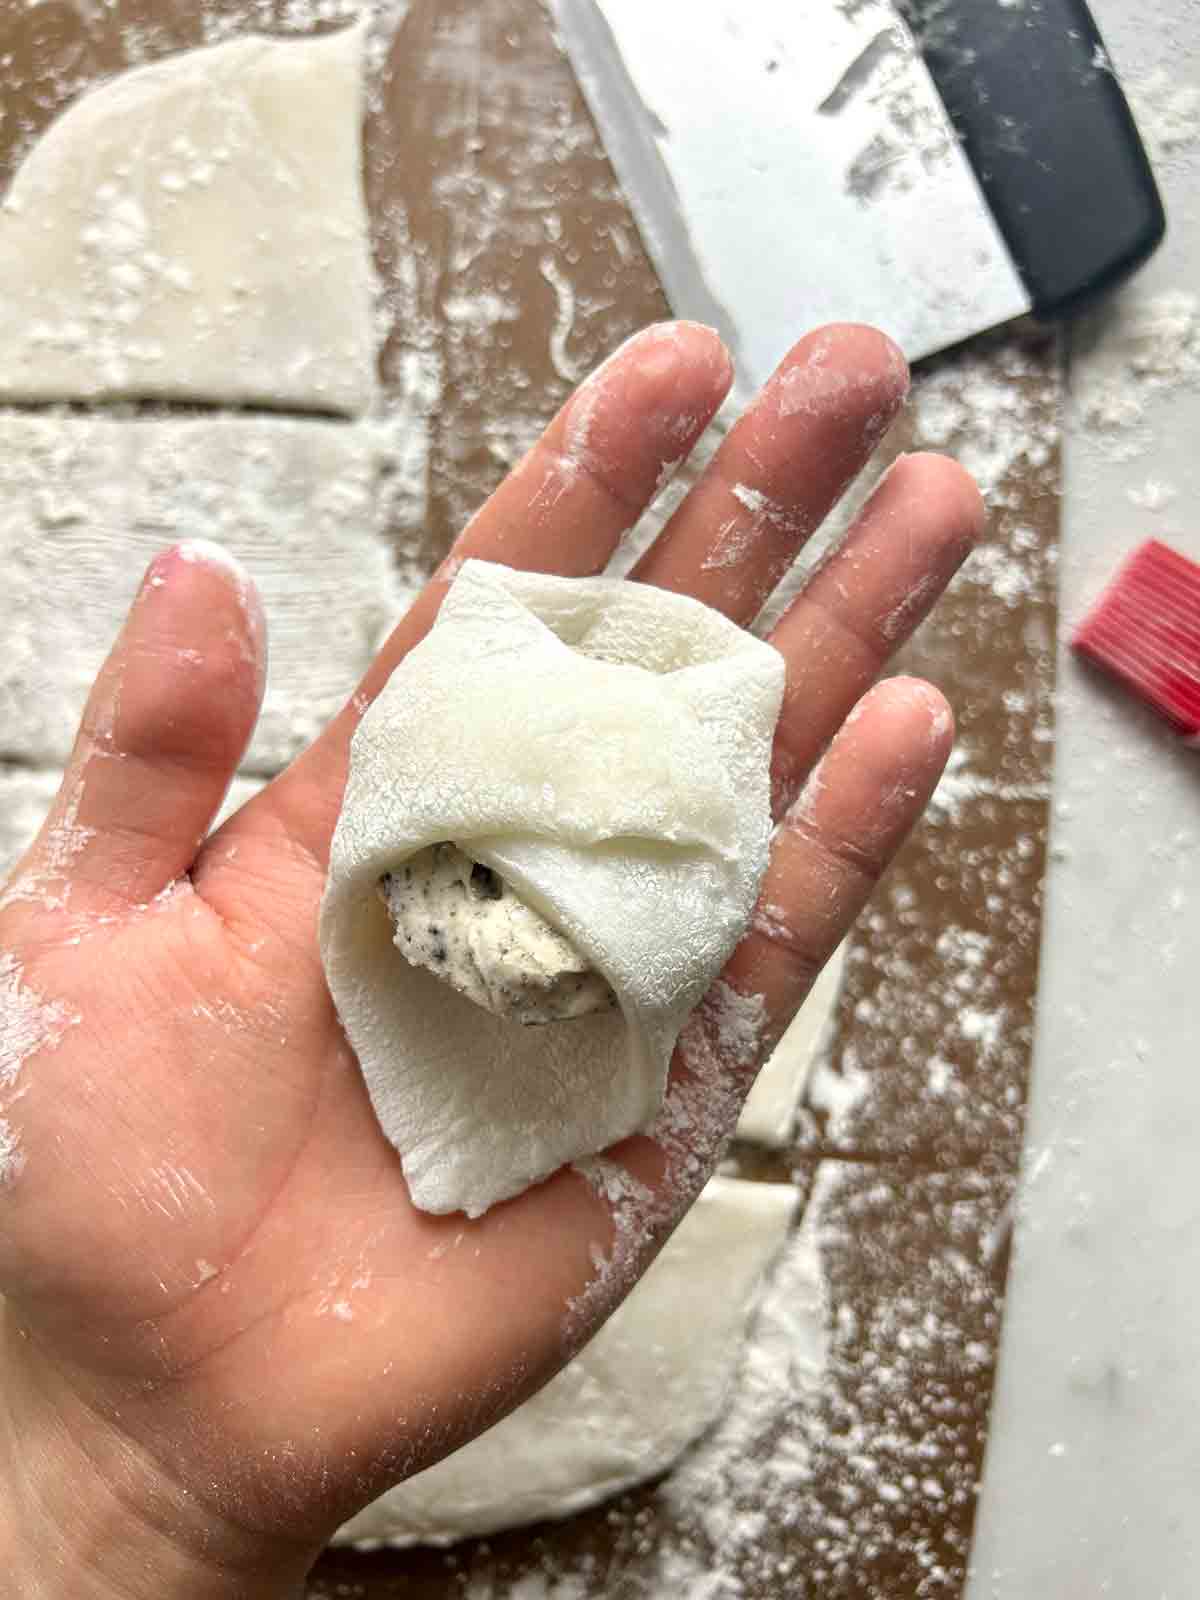
Take a piece of dough and put a scoop of ice cream in the center (keep the other pieces of ice cream in the freezer as they melt quickly). Pull the sides of the mochi over the top of the filling and press gently to seal it. This part can be tricky because the dough is sticky.
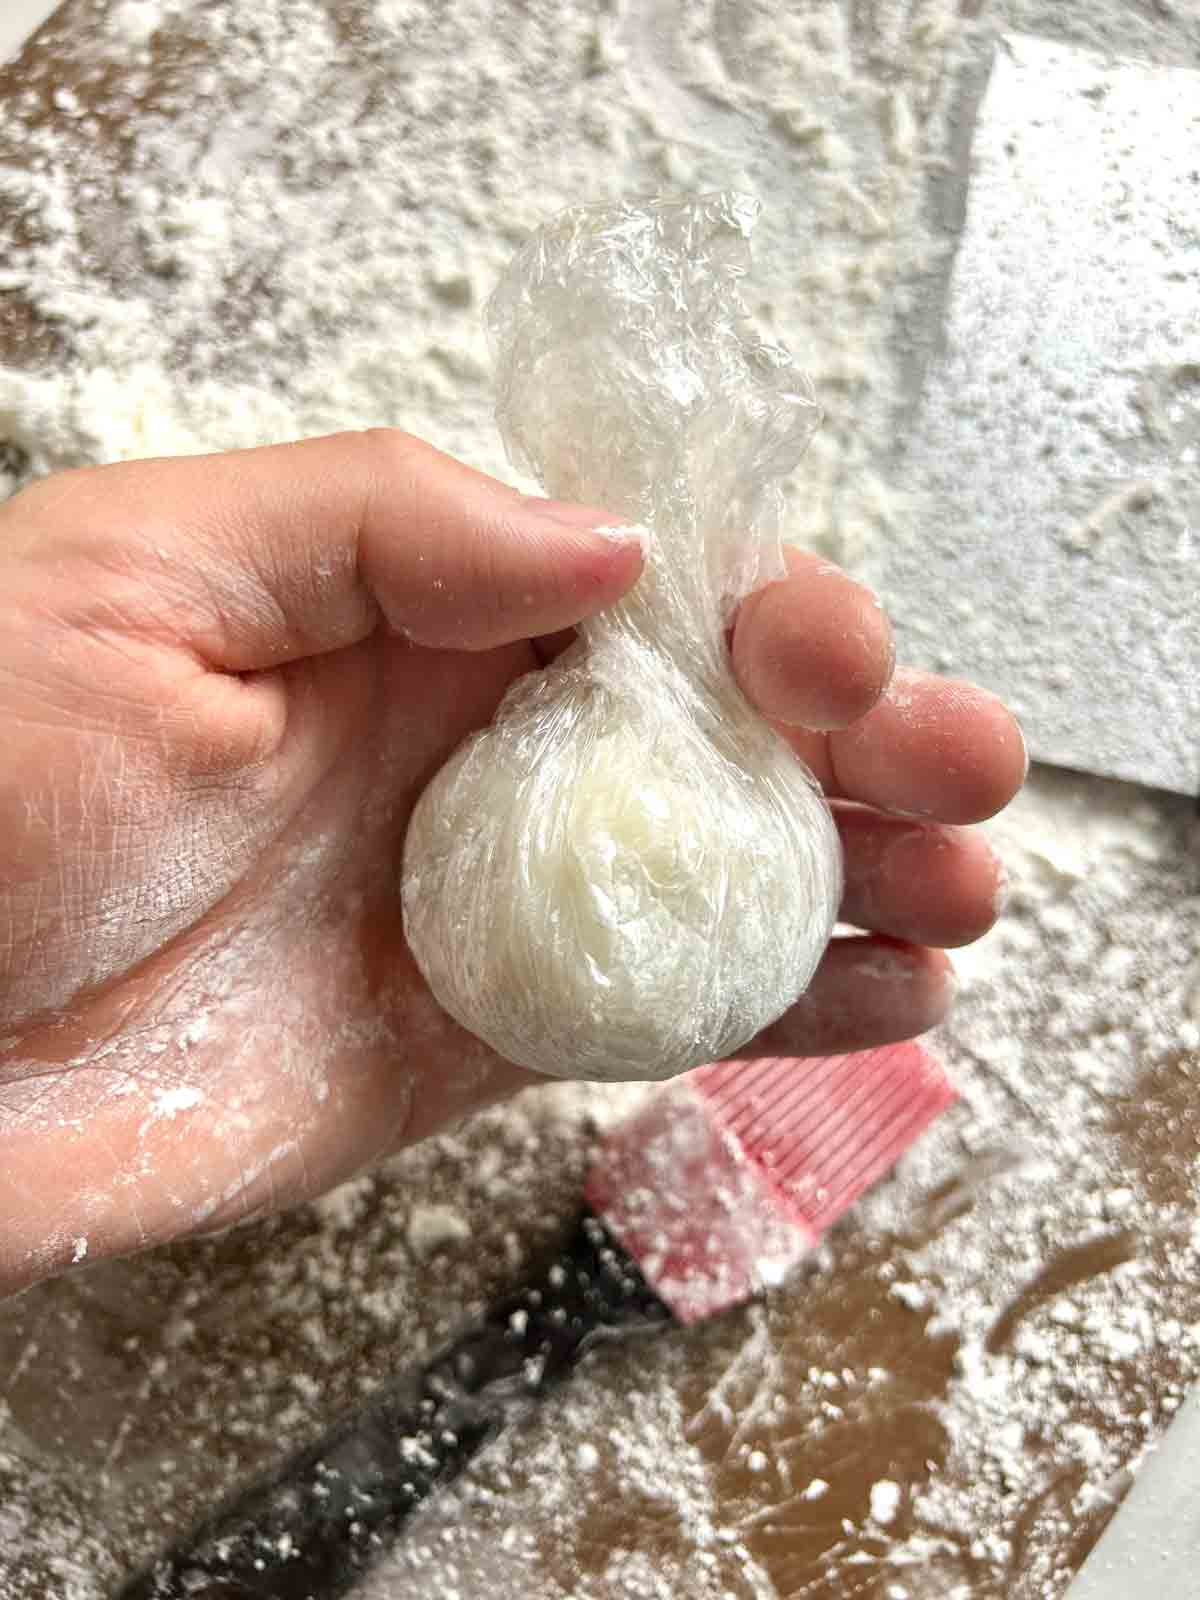
If you are having trouble, you can use a piece of plastic wrap to wrap the mochi the mochi instead:
Once the mochi is wrapped, put it in the freezer so it doesn't melt. I like to freeze them for at least 30 minutes before eating. If you freeze them overnight, make sure to let them defrost for 10 minutes at room temperature before serving.
Oreo Ice Cream Mochi
Ingredients
- 2 cups vanilla ice cream
- 6 Oreo cookies
- 1 cup (+2 tablespoons) glutinous rice flour
- ¼ cup sugar
- 1 cup water
- cornstarch (for dusting)
Instructions
Make ice cream filling
- Line a baking sheet with parchment paper and pop it in the freezer for 10 minutes.
- Use a food processor to crush the Oreo cookies. I like to leave a few big chunks intact so that you get chunks of cookie in each bite. If you don't have a food processor, you can also use a Ziplock bag and a rolling pin.
- Combine the crushed Oreos and vanilla ice cream in a small bowl. Transfer to the freezer to firm up for 10 minutes.
- Use an ice cream scoop to scoop out 8 portions of ice cream onto the cold baking sheet. Try to make the bottom as flat as possible. Freeze the filling for one hour to firm up.
Make dough
- In a large microwave-safe bowl, combine the glutinous rice flour, sugar, and water. Stir until smooth then cover with plastic wrap. Microwave in 1-minute intervals, stirring vigorously between each interval, until it forms a thick and sticky dough. It took me 3 intervals. If you are unsure whether the dough is cooked, just cook it for another interval.
- Allow the dough to cool for 15 minutes.
Wrap mochi
- Dust your work surface with a generous amount of cornstarch. Place the dough on top and dust it with cornstarch as well.
- Roll the dough into a ¼-inch thick rectangle. Use a cookie cutter or knife to cut the dough into 8 portions. The exact number of portions depends on how big you made the ice cream pieces.
- Take a piece of dough and use a pastry brush to dust off extra cornstarch from the top. Place a piece of ice cream in the center (keep the other ice cream pieces in the freezer so they don't melt). Pull the sides of the dough over the top of the filling. Gently press to seal, then place it seam-side down on a plate in the freezer while you make the rest.
- Freeze the mochis for about 30 minutes then they are ready to enjoy!


Leave a Reply